StarUI HUD
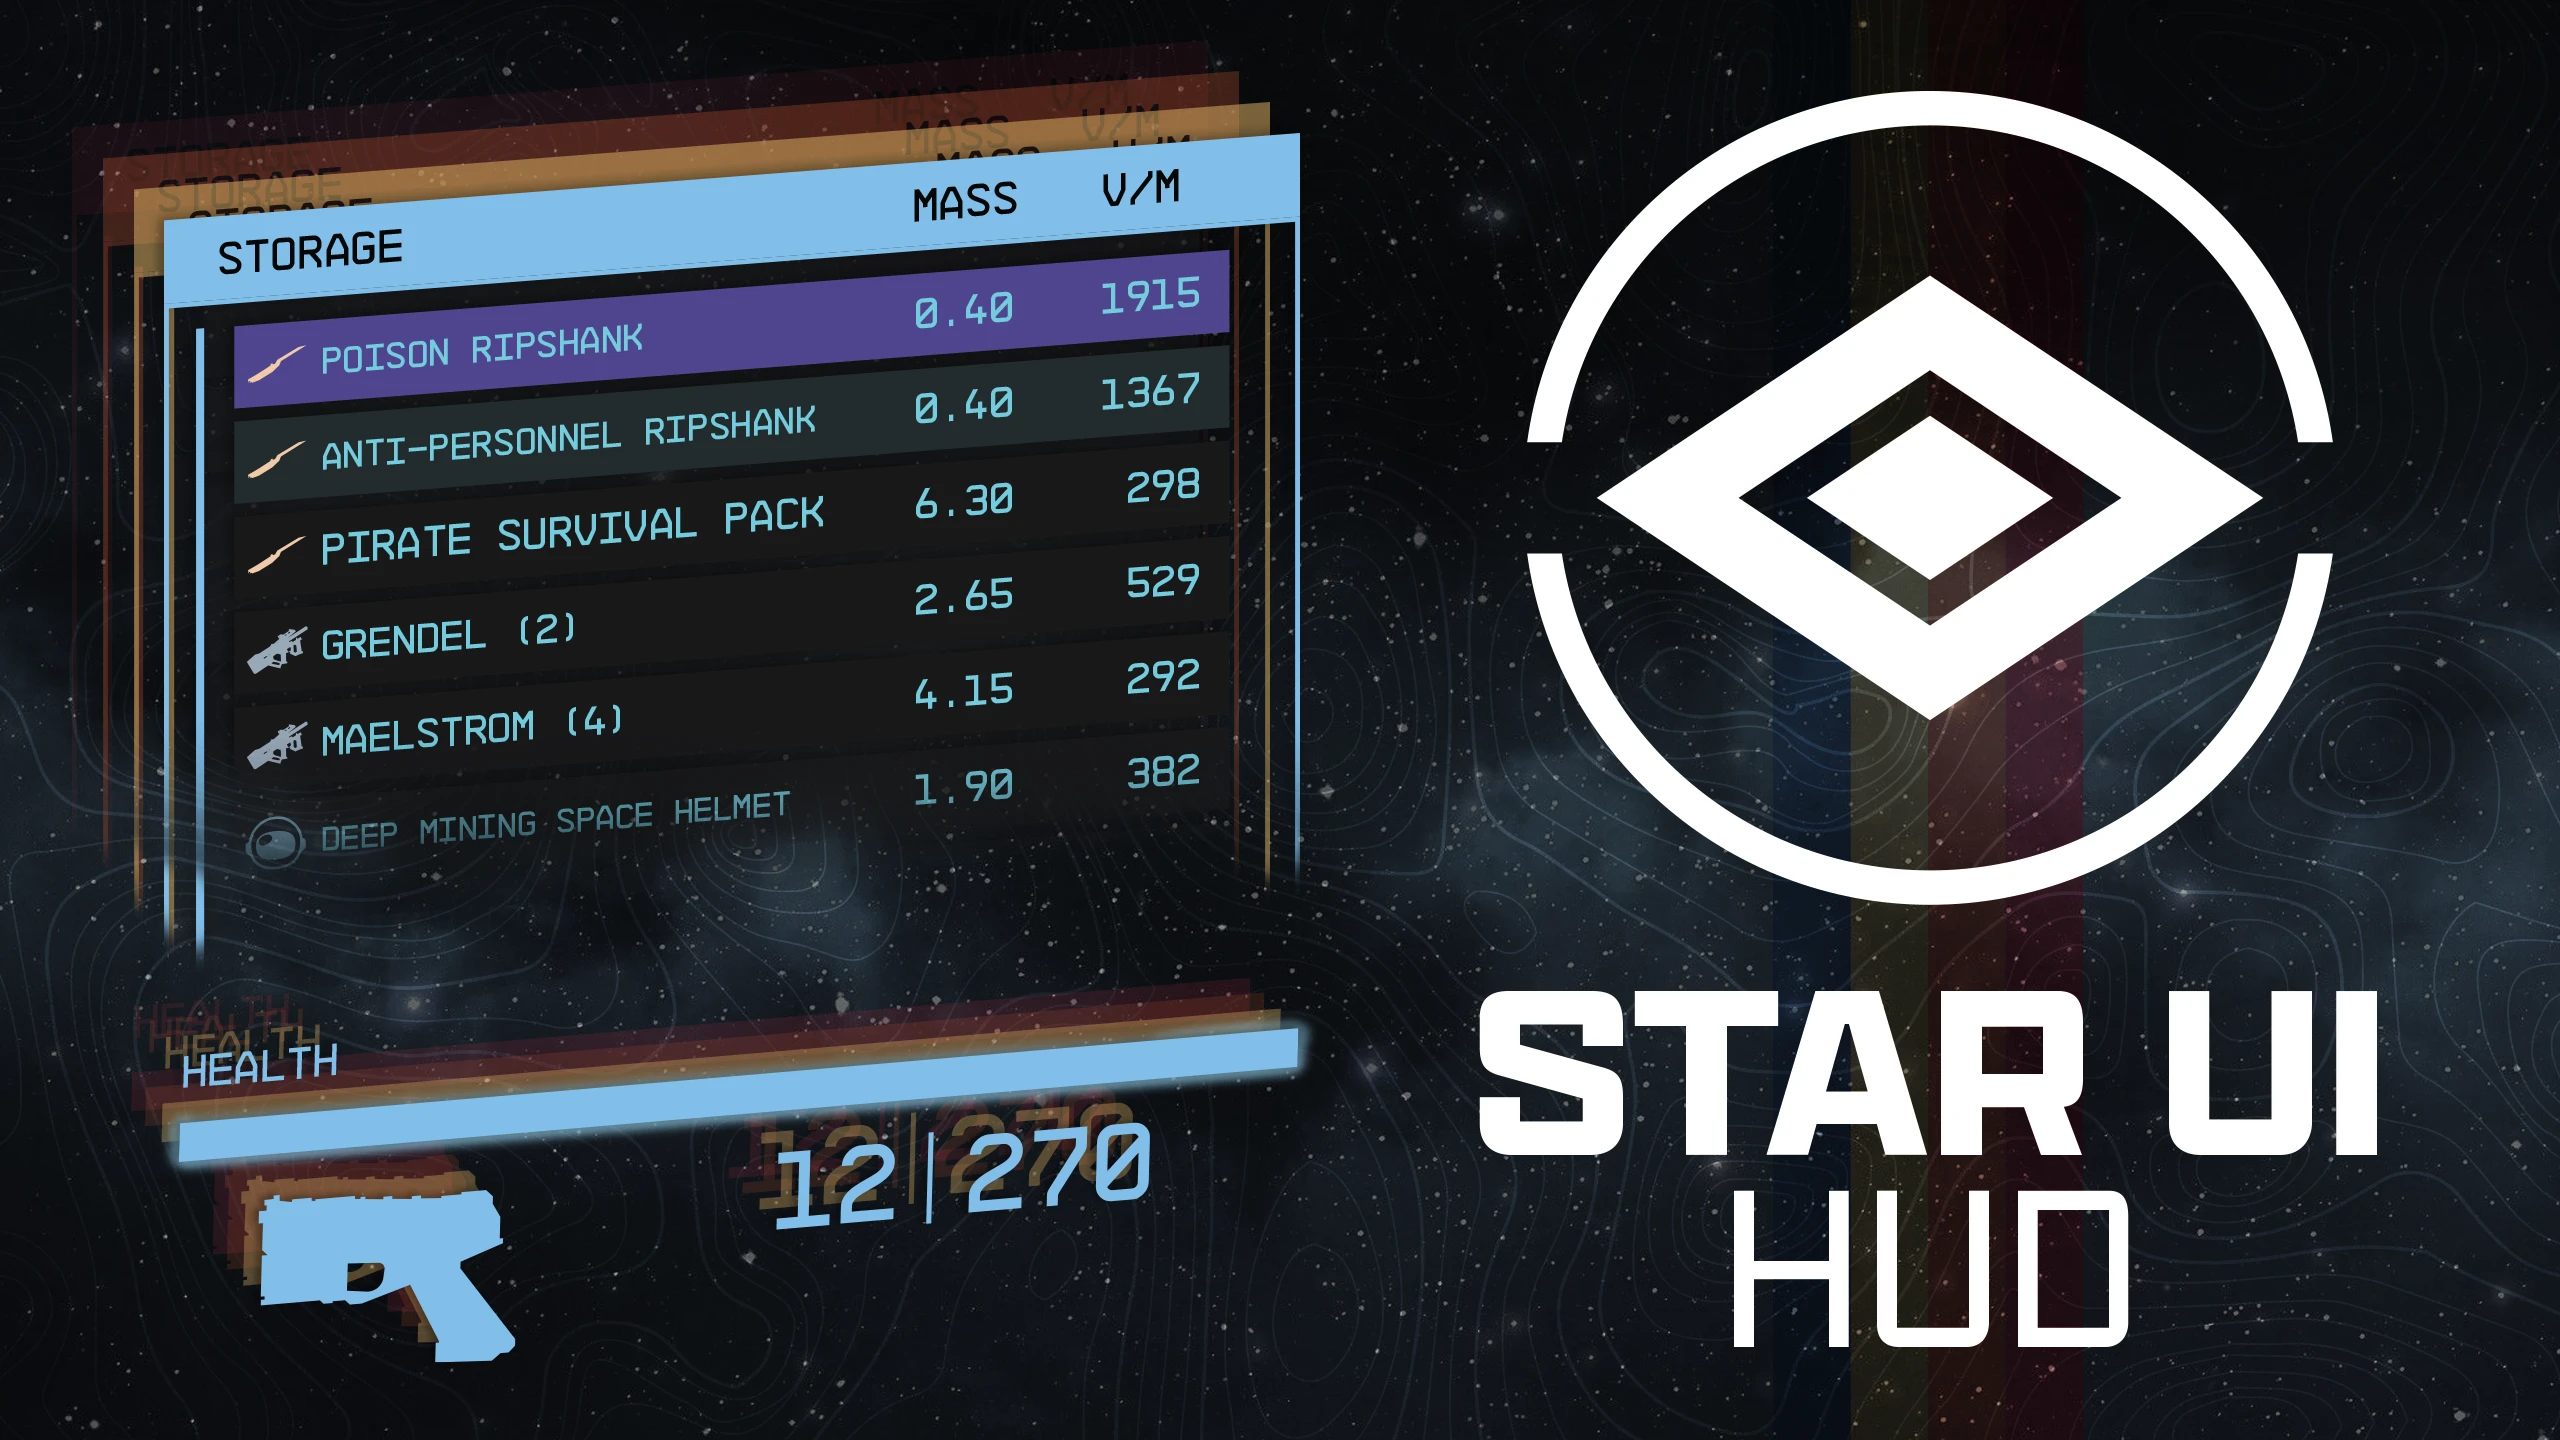
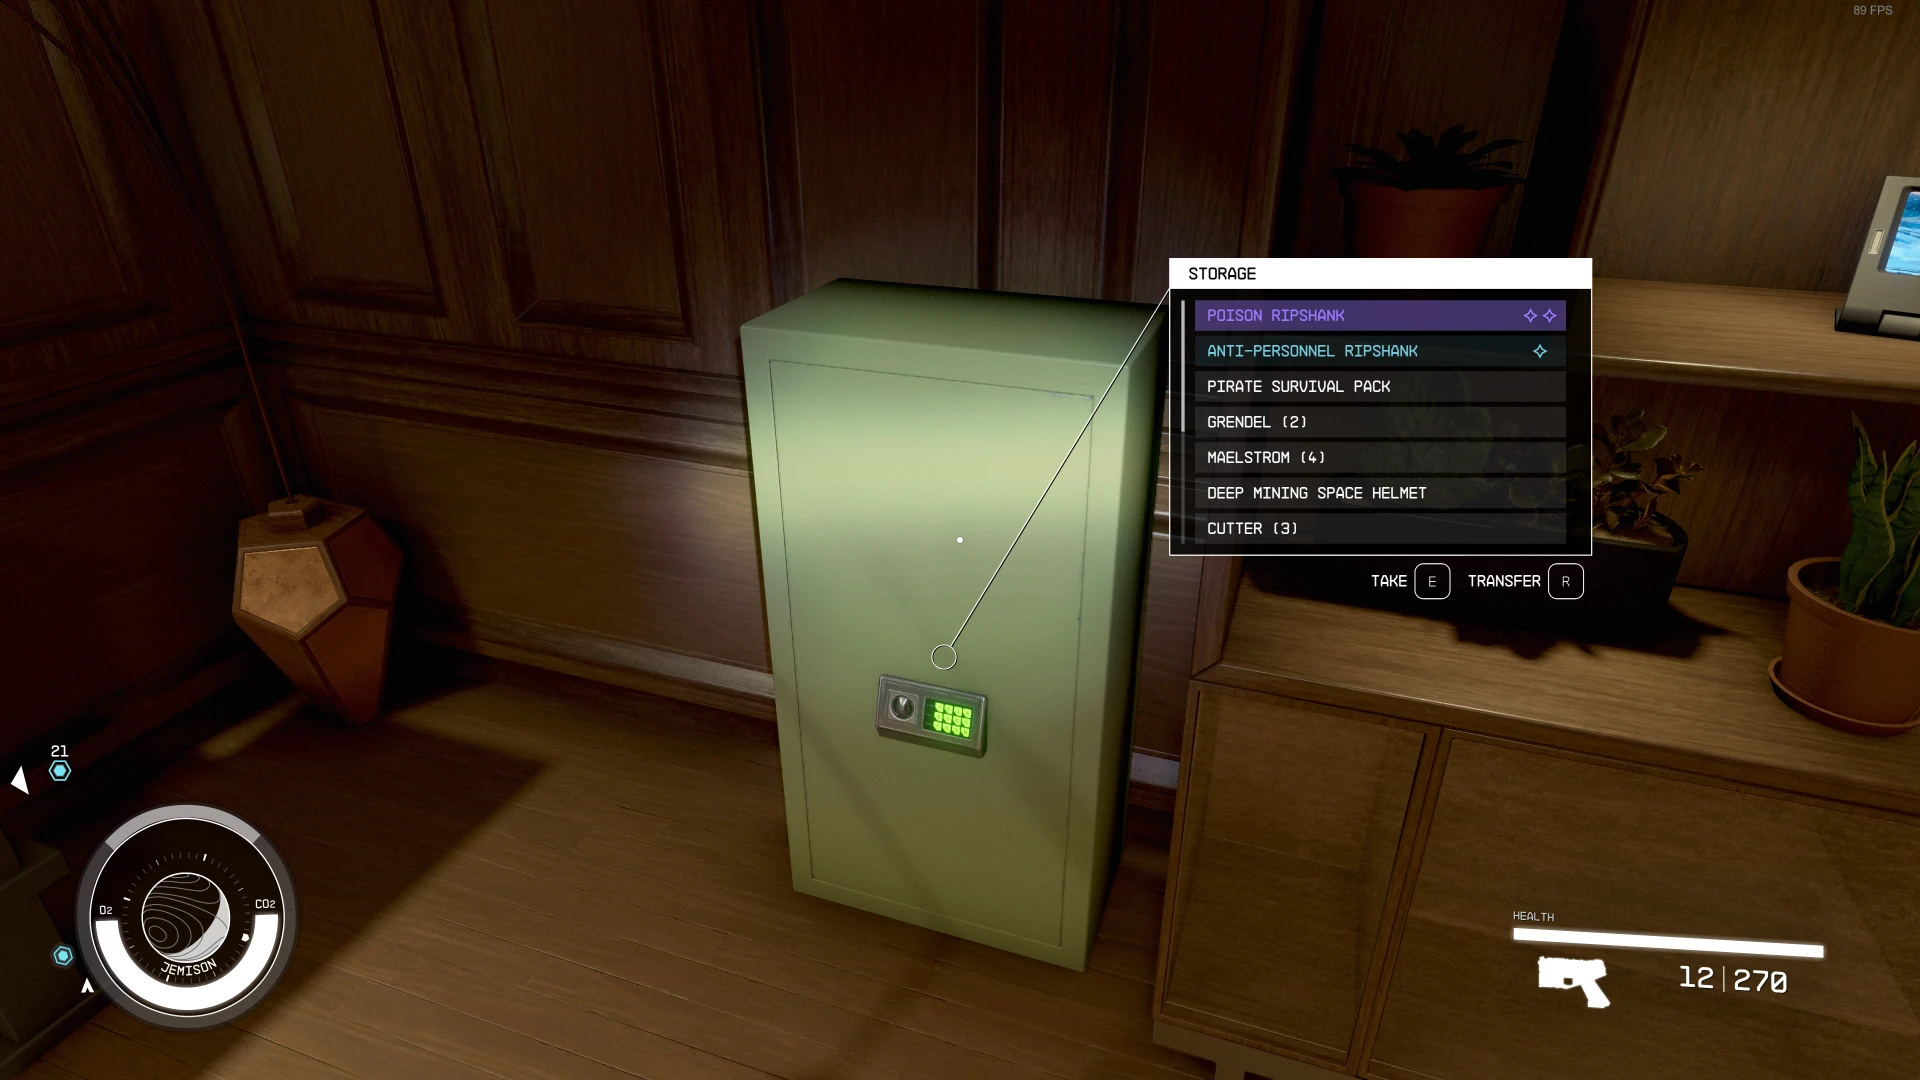
StarUI HUD让你完全掌控大多数HUD组件,并提供更新后的战利品列表,以及更优的物品卡片,内含DPS和V/W。可调整大小、移动、更改颜色或禁用大多数HUD组件。战利品列表可显示额外列,如V/W(可排序),并能展示悬停物品的物品卡片!
 查看大图
查看大图
StarUI HUD 让您完全掌控大多数 HUD 小部件,并提供更新后的战利品列表和带有 DPS 与 V/W 的更好物品卡片。您可以调整大小、移动、重新着色或禁用大部分 HUD 小部件。战利品列表可以显示额外的列,如 V/W(可按此排序),并在悬停物品时显示其物品卡片!

- 根据您的喜好更改 HUD 上的大多数小部件:
- 单独更改每个小部件的位置、缩放(大小)、旋转和颜色(可使用颜色修改器或颜色覆盖)
- 如果不想看到它,可以将其隐藏!
- 对于特殊的手表和玩家状态小部件:可以调整 3D 位置(仅限 3D 专家)或直接停用 3D 效果。
- 新小部件:标签标签
- 减少 HUD 的杂乱程度,让您专注于重要的事情。
- 在准星下方显示物品名称和物品标签图标。这样您无需查看大物品卡片即可知道物品是什么(大物品卡片已移至屏幕右上角,因为您并不真正需要它)
- 对于已标记、被盗或违禁品物品,将在名称后添加相应的图标
- 垃圾物品显示略微褪色,因此这些物品更不引人注意
- 可自定义,如果不需要,也可以禁用
- 新小部件:Loot-O-Meter(战利品计量表)
- 在准星下方显示一个条形,根据物品的价值/质量比填充。这样您可以轻松看到值得拾取的物品!
- 条形颜色可根据填充程度从红色变为橙色再变为绿色
- 可自定义,如果不需要,也可以禁用
- 升级版战利品列表(快速容器视图)
- 动态大小,可显示更多物品(或更少,如果您喜欢)
- 根据内容自动调整高度
- 每个物品都有物品标签图标 - 轻松查看物品类型!
- 额外的可配置列(默认添加 V/M 列)。列表也可以按该列排序(游戏中可按 ALT 键在列之间切换)
- 为高亮物品显示物品卡片
- 升级版物品卡片
- 添加了物品标签图标
- 为所有有价值和质量的物品添加了 V/M 值
- 为武器添加了 DPS 值(爆发 DPS,不考虑装填时间)
- 可着色、可重新定位和可调整大小:所有物品卡片都可以根据显示场景进行调整
- 生活质量改进
- 防止意外偷窃 - 如果按下拾取按钮会导致偷窃,将阻止该操作。您需要潜行才能偷窃。
- 当拾取会构成偷窃时,战利品列表和标签标签小部件将变为红色。
- 大多数容器支持“全部拾取”功能 - 按冲刺键+拾取键即可全部拾取
- 自定义您的准星
- 提供多种准星设置,让您随心所欲。
- 选择一种替换模式(默认、仅点状、非瞄准时点状、无)或按类型、按瞄准状态和按第三人称状态单独自定义替换项。
- 按类型单独着色和调整准星大小。想要一个大红色的手枪准星,但一个小绿色的步枪准星?您可以做到!
- 自定义您的手表
- 除了标准的小部件设置外,您可以禁用手表的各个部分,无论是为模组腾出空间,还是仅仅因为不喜欢某个部分。
- 提供四个预设供您选择:作者选择、作者选择(无颜色)、原版扩展和原版。您可以随时更改,并按自己的喜好自定义所选的预设!
- 可随时安全安装/移除!不影响您的存档,也不会阻止您获得成就!
- 集成了所有 Starfield 物品的排序系统,支持语言:EN, DE, ES, FR, IT, JA, PL, PTBR 和 ZHHANS。
- 您可以控制准星圆圈和指引线在不同情况下的可见性(指引线从所视物品连接到物品卡片/名称框)
- 缩小按键/控制器按钮的图标,并略微淡化按钮栏
- 在通往其他区域的门上显示大型门图标(例如,那些会触发加载画面的门)
- 完整的翻译支持(如果您所在语言的翻译已可用,请参见本页的翻译部分)
- 许多其他或大或小的改进
- 完全可自定义(请参阅文档完善的 INI 文件)

- 直接使用 Vortex 或 Mod Organizer 2 安装(手动安装请打开下方折叠内容)
- 在您的 INI 中启用 Archive Invalidation(强制文件加载)
- 在 BethINI 中只需单击一次(启用“Load Loose Files”并保存)
- 或者:参见这篇简单的 Howto: Archive Invalidation
备用手动安装
- 将压缩包中的
Interface\文件夹复制到您的Starfield\Data\文件夹(ba2 文件所在位置)- 忽略fomod和Optional文件夹 - 如果该文件夹对某些人不起作用,请将文件复制到您的
Documents\My Games\Starfield\Data\文件夹(如果Data\不存在,请创建) - 从
StarUI HUD Presets\子文件夹中选择三个预设之一,并将 INI 文件内容复制到Interface\目录下的一个新文件StarUI HUD.ini中。 - (可选)30fps 或 120fps 版本:完成上述步骤后,从
Optional\中相应的子文件夹复制文件并覆盖现有文件。

您可以自定义此模组的每一个方面。
使用 StarUI Configurator 通过易于使用的图形界面配置此模组中的任何设置。
您也可以手动操作:查看文档完善的 INI 文件 StarUI HUD (default).ini,并根据自己的喜好进行调整!
预设
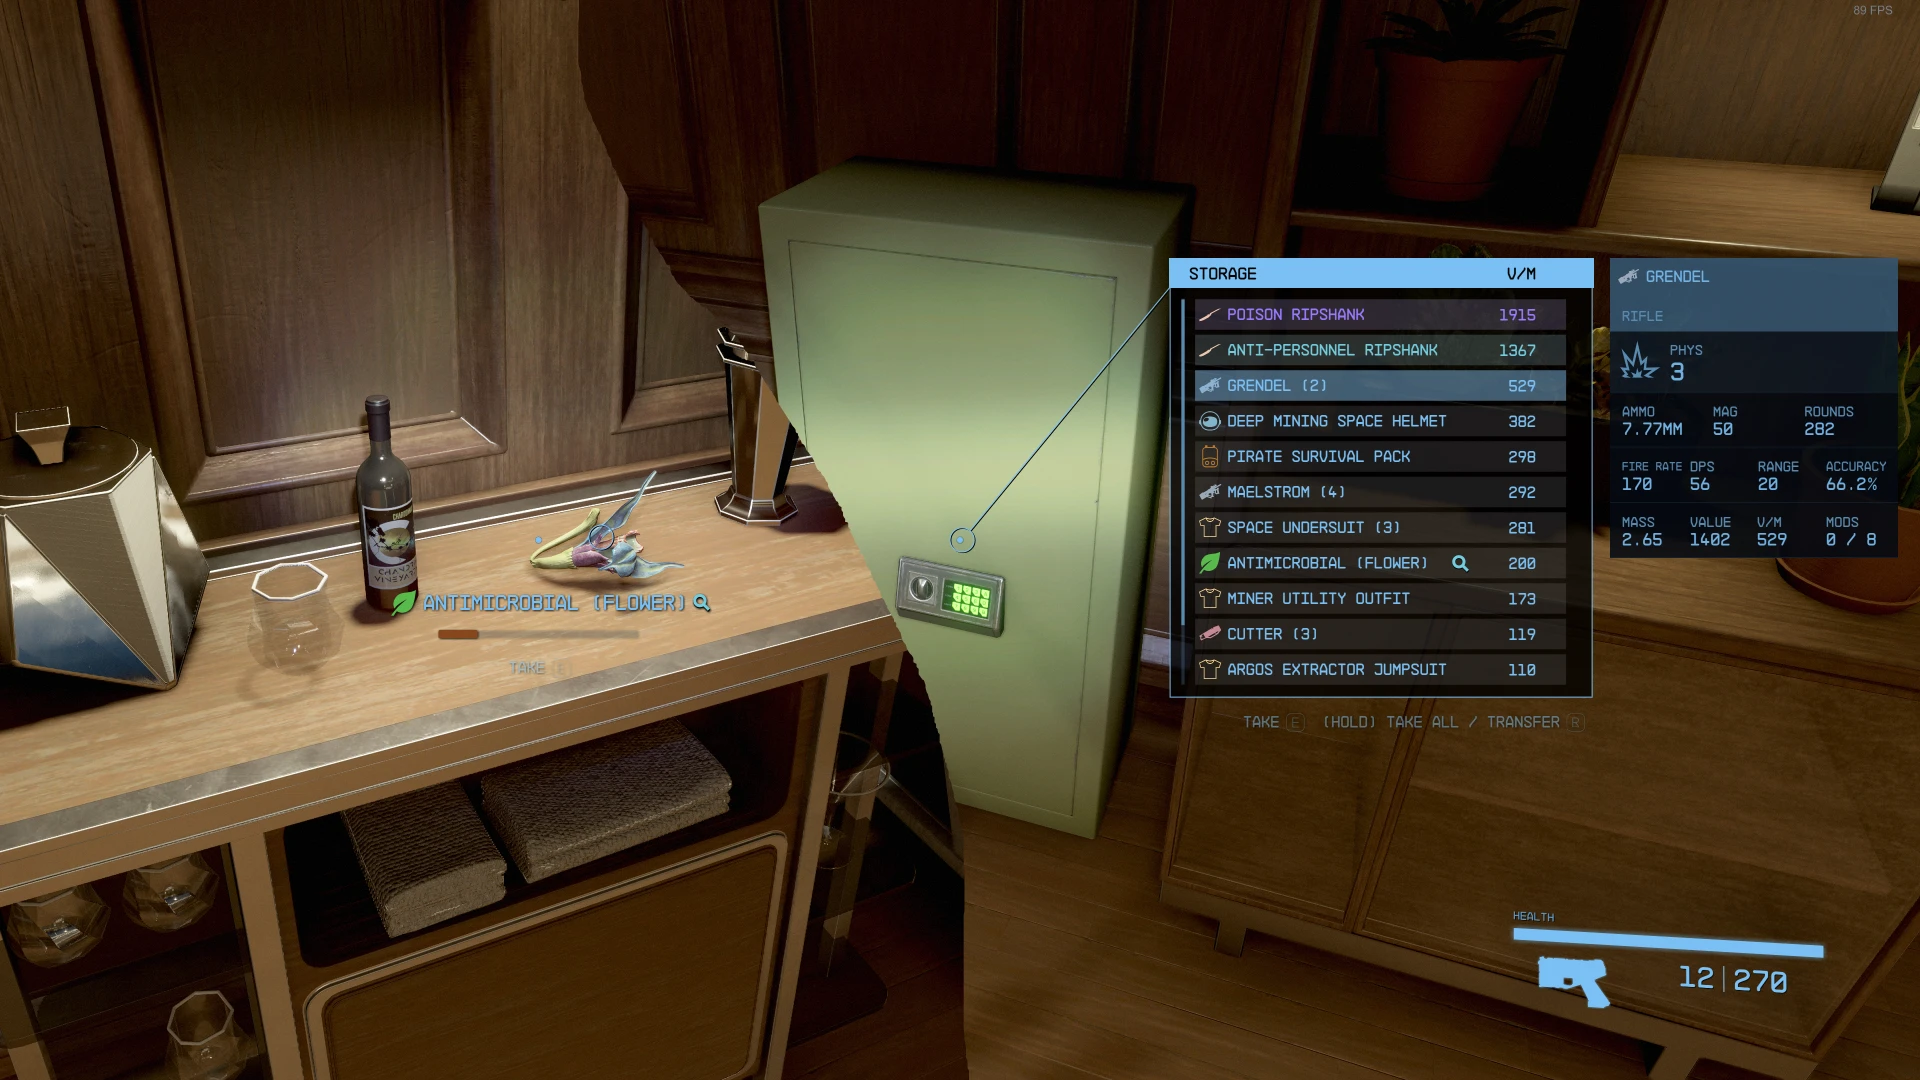
此模组附带三个预设:作者选择、原版扩展 和 扩展。点击预览: (点击放大图片)
作者选择
原版扩展
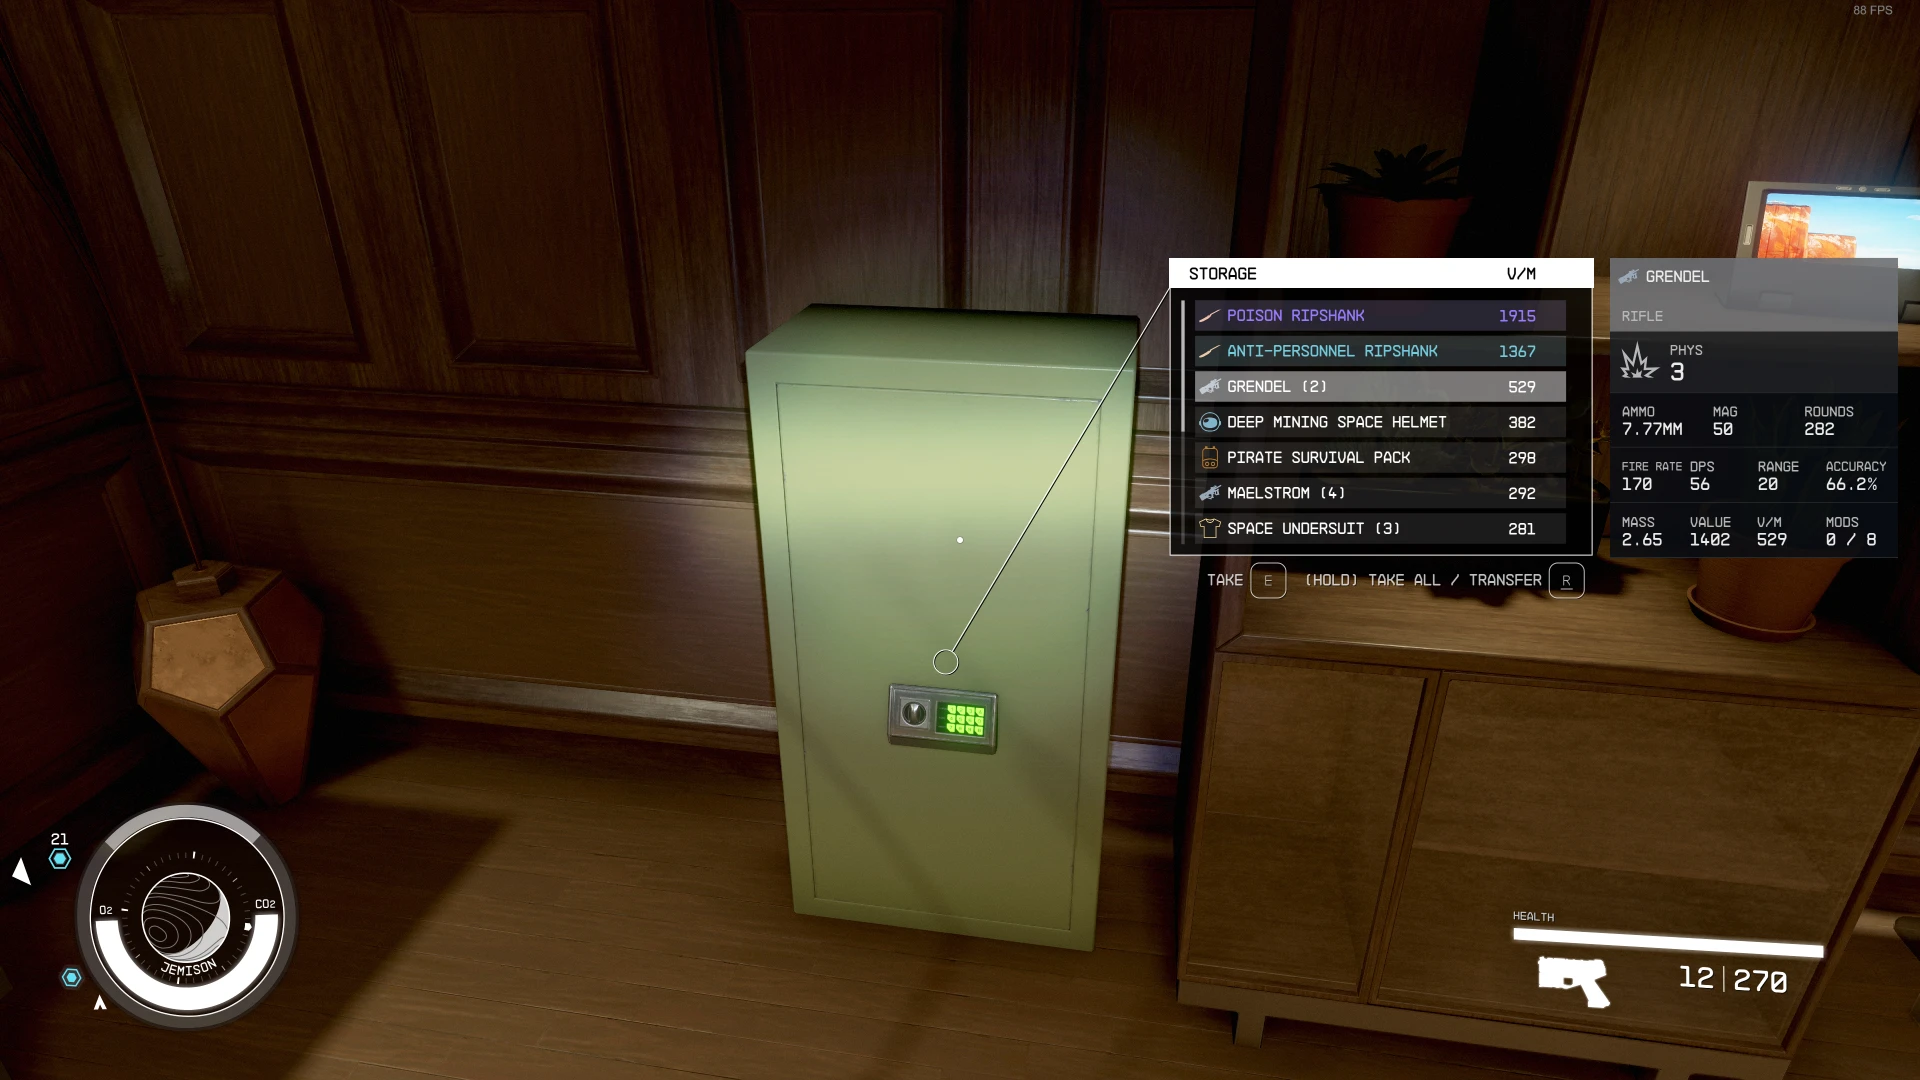
原版
提示
- 您可以随时切换到另一个预设。预设会被复制到文件夹
Interface\StarUI HUD Presets。只需将 INI 内容复制到您的StarUI HUD (default).ini即可。 - 提示 2:复制文件
StarUI HUD (default).ini并将其重命名为StarUI HUD.ini。这个 INI 文件也将会被读取,并且不会被模组更新覆盖! - 提示 3:当您编辑设置时:只需快速保存/快速加载即可加载您更改的配置!
INI 设置文件 作者选择预设 INI 文件:
[StarUI HUD]
; =================================
; Configuration file for StarUI HUD
; =================================
;
; Allows you to configure many different settings for your StarUI HUD layout.
; To adjust the widgets and their position and color see the widget section later in this file
;
; Some general notes and tips:
;
; Position
; --------
; The position is specified based on a 1920x1080 layer. If you have another resolution, it will
; automatically transformed into the position on your monitor.
;
; Color
; -----
; The sColors values are color modifiers, so if apply a red color to a green element it will
; become orange!
; For most widgets you have the option bForceColor, which will force the color. But be careful,
; this setting will remove ALL color information as well as any brightness levels from the widget.
; The colors are specified as "red, green, blue(, alpha)" where alpha is optional.
; RGB values are from 0 to 255. Alpha is from 0 to 100 (percent).
; Most colors are optional overrides. So if you don't specify a value for the widget, it will
; use the hud's default color (sHudDefaultColor).
;
; Examples:
;   black is "0, 0, 0"
;   white is "255, 255, 255"
;   red is "255, 0, 0"
;   blue is "0, 0, 255"
;   half-transparent without color is "255, 255, 255, 50"
; Color tip: Use any of the common RGB color picker on the net to find your values!
;
; Anchors
; -------
; Define a point on an element for various features (like as alignment for the item card, so in
; which direction an item card should be drawn or at which point the leading line attaches to)
;
; Valid values: TopLeft, TopRight, BottomLeft, BottomRight, {HorizontalOffset}% {VerticalOffset}%
;
; Examples for free percent values:
;   0% 0%     - Equals TopLeft
;   100% 0%   - Equals TopRight
;   100% 100% - Equals BottomRight
;   50% 50%   - The center of the shape
;   0% 25%    - This will position the anchor on the left side on 1/4 height.
;
; Tips
; ------------
; * You can edit this file while the game is running. A simple quick-save/quick-load should
;   load the new configuration!
; * Copy this file and rename the copy to "StarUI HUD.ini". Then change your settings in the
;   new file. The new file won't be overwritten by mod updates!

;=============
; HUD Generic
;=============

; Default HUD color (may be overridden by a elements special color)
sHudDefaultColor = 122, 192, 244
; Use hard drop-down-shadows instead of soft ones
bHudHardDropDownShadow = 0

;=============
; Quality-Of-Life
;=============
; Preventing accidental steals. Changes the button for stealing, so you need to hold it to steal.
bHudPreventStealAccident = 1

;=============
; Item marker
;=============
; This is the circle on objects in the world you are looking at
; Enable or disable the line from the item marker (circle) to other elements for different types of viewed element...
; Note: When using the new TagLabel it's recommended to it disabled.
; ...when viewing a generic entity (bed, chair,...)
bHudReticleLineForGeneric = 0
; ...when viewing an item without item card (late game)
bHudReticleLineForSingleItem = 0
; ...when viewing an item with item card
bHudReticleLineForSingleItemWithItemCard = 0
; ...when viewing a inventory
bHudReticleLineForLootList = 1
; Colorize your item marker circle (and line)
sHudReticleColor =
sHudReticleStealColor = 255, 128, 128

; =================
;  Standard Label
; =================
; The white box you see mostly in Vanilla and Vanilla Extended when hovering things without item cards
sLabelColor =
sLabelStealColor = 255, 128, 128
sLabelContrabandColor = 253, 204, 36

; =============
;  Tag Label
; =============
; The "Tag Label" is a alternate (new) way to display the item you're looking at.
; Displays a smaller widget for the item instead of only big item card - Fixed at the crosshair or (optional) floating above the item in the world
bHudEnableTagLabelCrosshair = 1
; Tag label - But this one is bound to the world item (You should only use one to prevent confusion)
bHudEnableTagLabelWorld = 0
; Position of the Tag Label (relative to crosshair/world item)
fHudTagPositionX = 0
fHudTagPositionY = 50
; Scale (size) of the Tag Label (in percent)
iHudTagLableScale = 100
; Add an item tag icon to items
bHudTagShowItemTags = 1
; Colerize
sHudTagLabelColor =
sHudTagLabelStealColor = 255, 128, 128
sHudTagLabelContrabandColor = 253, 204, 36
; Force the item tag icon to be in the same color as the label
bHudTagLabelForceTagIconColor = 0
; The newest high-tech HUD addon by the Constellation engineers: Showing the value/mass as a bar on your HUD!
; The Loot-O-Meter will add a bar below the item name which visualizes the V/M ("value per mass") value for this item.
; The higher the V/M value, the fuller the bar.
bHudTagLabelLootOMeter = 1

; ==============
;  Loot-O-Meter
; ==============
; Customize the look of your Loot-O-Meter (part of Tag Label):
iLootOMeterWidth = 200
iLootOMeterHeight = 8
iLootOMeterRoundEdges = 3
sLootOMeterBgColor = 140,140,140,20
sLootOMeterBarColor = 255,255,255,100
iLootOMeterMaxValue = 1000
bLootOMeterColorBasedOnValue = 1
sLootOMeterValueBasedColor1 = 135, 30, 30
sLootOMeterValueBasedColor2 = 135, 135, 30
sLootOMeterValueBasedColor3 = 30, 135, 30

; ===============
;  Rarity colors
; ===============
sRarityColorRare = 80, 136, 244
sRarityColorEpic =
sRarityColorLegendary =

; ==========
;  Big Door
; ==========
; Enables a big door icon indicator when you look at a door which leads to other areas/cells (part of Tag Lable)
bHudEnableBigDoorIcon = 1
; Colorize the door icon
sHudBigDoorColor =

; ============
;  Button Bar
; ============
; Smaller buttons for the button bar
bButtonBarSmallerButtons = 1
; Moves the button bar to the new tag label
bButtonBarMoveToTagLabel = 1
; Colorize the button bar
sHudButtonBarColor =
sHudButtonBarStealColor = 255, 128, 128
; Fade out things you read once and never need again
iButtonBarOpacity = 50

;=========================
; Item card - all versions
;=========================
; Display the item tag icon in the item card
bItemCardAddItemTag = 1
; Enable colored version of item tag
bItemCardItemTagColored = 1
; Add a new entry for the value per mass
bItemCardAddValuePerMass = 1
; Add a new entry for Burst DPS (Damage per second, without reloading time)
bItemCardAddDPS = 1
; Colorize the item card
sItemCardColor =
; Colorize the item card for STEAL mode
sItemCardStealColor = 255, 128, 128
; Colorize the item card for CONTRABAND mode
sItemCardContrabandColor = 253, 204, 36

; Define where the reticle line should attach to (leave empty for auto-aligning it to the left side of the item card headers bottom line)
sItemCardReticleLineAttachAnchor =

[ItemCard_SingleItem]
; Position of the item card (when hovering items. Default: 1168, 257)
;   Values for top right display: X=1900, Y=20,  Anchor=TopRight
;   Values for Vanilla display:   X=1168, Y=257, Anchor=TopLeft
fPositionX = 1900
fPositionY = 20
; Specify the max height. The item card will be scaled down if the limit is exceeded. (Default is to respect the remaining screen space)
fMaxHeight = 850
; Anchor for the item cards position (this determines in which direction the item card will expand from your given position, e.g. TopLeft will expand to right/down, BottomLeft to right/up)
; Valid values for anchor: TopLeft, TopRight, BottomLeft, BottomRight
sAnchor = TopRight
; Scaling (size) of the item card (in percent)
iScale = 100

[ItemCard_SingleItem_ScanMode]
; Position/scale of the item card in scanner mode.
; For a detailed description of the settings see [ItemCard_SingleItem]
fPositionX = 1358
fPositionY = 257
fMaxHeight = 600
sAnchor = TopLeft
iScale = 100


[LootList]
; ===========
;  Loot List
; ===========
; Enable StarUI HUD's upgraded loot list with icons, extra information, resizable and more
bEnable = 1
; Show item icon tags in the list
bShowItemTags = 1
; Enable colored version of item tag
bItemTagColored = 1
; Add extra columns to the loot list. You can add multiple columns separated by comma.
; For a list of available columns see the list later in the file. Most probably you like to use one of those: VPM, DPS, VALUE, VALUE_STACK, MASS, MASS_STACK
; Tip: You can toggle the sort when looking at the list and pressing ALT key
sAddColumns = VPM
; Sort the loot list by a column (the column does not need to be visible). You can use TAG here to sort by the items tag. Leave empty or use GAME for vanilla sort.
sSortByColumn = GAME
; Width of the additional column
iExtraColumnWidth = 65
; Add the extra function "Take All" to loot list (Hold the transfer key to take all at once)
bAddTakeAll = 1

; Auto-adapt list height to content (max to the specified height below)
bAdaptHeightToContent = 1
; Colorize the list!
sColor =
sStealColor = 255, 128, 128

; Scale (size) of the whole list
iScale = 100

; List position in normal mode (Default: 1193, 302)
fPositionX = 1193
fPositionY = 302
; List dimension in normal mode (Vanilla: 373x248, Default: 373x390)
iWidth = 373
iHeight = 390

; Loot list position in scanner mode
; Note: The list headline is provided by the scanner interface. Keep that in mind when changing the position in scanner mode.
fScannerPositionX = 1380
fScannerPositionY = 565
; Loot list dimension in scanner mode
iScannerWidth = 373
iScannerHeight = 248

; Attach point of the reticle line (from item circle to the list). Available: TopLeft, TopRight, BottomLeft, BottomRight
sReticleLineAttachPoint = TopLeft

; Show an item card to the item you have hovered in the list (for position/scale see the next sections)
bShowItemCard = 1
; Select categories for the item card. Only list items in this categories will show a item card
sShowItemCardCategories = Weapons, Ammo, Spacesuits, Packs, Helmets, Apparel, Throwables, Aid, Notes, Resources, Misc

[LootList.ItemCard]
; Position/scale of the item card for the loot list (normal mode)
; For a detailed description of the settings see [ItemCard_SingleItem]
fPositionX = 1610
fPositionY = 258
sAnchor = TopLeft
iScale = 80
fMaxHeight =


[LootList.ItemCard_ScanMode]
; Position/scale of the item card for the loot list (scanner mode)
; For a detailed description of the settings see [ItemCard_SingleItem]
fPositionX = 1410
fPositionY = 500
iScale = 80
sAnchor = BottomLeft
fMaxHeight =


; =============
;  HUD Widgets
; =============
; Re-position and colorize every widget like you want. If you set no value for the color, then sHudDefaultColor is used.
;
; Enable or disable the whole widget with bEnabled.
; Also allows you to enlarge or shrink the widget (fScale) and rotate it (fRotation).
;
; Special values are explained above the setting.
; For a explanation of position and color see the file header.

[Watch]
; The watch in the bottom left area
bEnabled = 1
; Colorize the widget. If the value is empty, the default HUD color will be used.
sColor =
bForceColor = 0
; Re-position the widget - default position: 72, 808 (for 16:9. Different on widescreen!) - Remove the leading ";" to adjust position
; Note: The widget uses a 3D effect, so adjusting the position can be tricky (Just try some values and see where it ends)
;fPositionX = 72
;fPositionY = 808
; Note scale and rotation work only with disabled 3D effect
fScale = 100
fRotation = 0
; Disable the 3D effect
bDisable3D = 0
; Adjust the 3D transformation matrix. Warning: Only for 3D experts! (remove ";" to change the values)
;s3DTransformationMatrix = 1.065422, -0.06871, -0.150934, 0, -0.037639, 1.062183, 0.191458, 0, 0.127329, -0.171576, 0.976908, 0, 41.719982, 807.84552, -4.454321, 1

; Enable mission markers
bEnableMissionMarker = 1
; Enable enemy markers
bEnableEnemyMarker = 1
; Enable special marker (like your ship)
bEnableSpecialMarker = 1
; Enable compass
bEnableCompass = 1
; Enable O2 bar (normal mode)
bEnableO2Bar = 1
; Enable planet icon
bEnablePlanetIcon = 1
; Enable location name
bEnableLocationName = 1
; Various displays in scan mode
bEnableScanO2Bar = 1
bEnableScanTemperature = 1
bEnableScanOxygen = 1
bEnableScanGrav = 1
bEnableScanLocationText = 1
bEnableScanBioAlertText = 1
bEnableScanEnvAlertText = 1


[RightMeters]
; Displays player health, weapon, grenades etc.
bEnabled = 1
; Colorize the widget. If the value is empty, the default HUD color will be used.
sColor =
bForceColor = 0
; Re-position the widget - default position: 1836, 1032 (for 16:9. Different on widescreen!) - Remove the leading ";" to adjust position
; Note: The widget uses a 3D effect, so adjusting the position can be tricky (Just try some values and see where it ends)
;fPositionX = 1846
;fPositionY = 1037
; Note scale and rotation work only with disabled 3D effect
fScale = 100
fRotation = 0
; Disable the 3D effect
bDisable3D = 0
; Adjust the 3D transformation matrix. Warning: Only for 3D experts! (remove ";" to change the values)
;s3DTransformationMatrix = 0.958322, 0, -0.285688, 0, -0.014952, 0.99863, -0.050155, 0, 0.285297, 0.052336, 0.957009, 0, 1879.831787, 1042.355225, 16.766846, 1

[Crosshair]
; The crosshair
bEnabled = 1
; Colorize the widget. If the value is empty, the default HUD color will be used.
sColor =
bForceColor = 0
; Re-position the widget - default position: 960, 540
fPositionX = 960
fPositionY = 540
fScale = 100
fRotation = 0

; Special options for crosshair

; Show crosshair when aiming (first person)
bShowInIronSights = 0

; Enable the spread animation (how far bullets go from the crosshairs center)
bEnableSpreadIndication = 1

; Show if a weapon/tool is effective by changing the color
bEnableEffectiveIndication = 1

; Crosshair replace mode
;
; The modes:
;   Default          - Default!
;   DotOnly          - Show only the DOT crosshair (always)
;   DotWhenNotAiming - Show the DOT crosshair when not aiming (for all weapon crosshairs)
;   None             - No Crosshair at all
;   Custom           - Define your own replacements (in the area below)
sReplaceMode = Default

; Colorize your crosshair by type! (leave empty for default crosshair widget color)
sColorPistol      =
sColorCutter      =
sColorDot         =
sColorShotgun     =
sColorRifle       =
sColorLaser       =
sColorTool        =
sColorInteraction =
sColorCommand     =

; Scale your crosshair by type! (in percent, default is the widgets scale)
iScalePistol      =
iScaleCutter      =
iScaleDot         =
iScaleShotgun     =
iScaleRifle       =
iScaleLaser       =
iScaleTool        =
iScaleInteraction =
iScaleCommand     =

; Note: ALL following replacements are only enabled if sReplaceMode is "Custom"
; Available crosshair types: None, Pistol, Cutter, Dot, Shotgun, Rifle, Laser, Tool, Interaction, Command
[Crosshair.CustomReplacements]
; Custom replacements for 1st person (needs sReplaceMode to be "Custom")
sReplacePistol      = Pistol
sReplaceCutter      = Cutter
sReplaceDot         = Dot
sReplaceShotgun     = Shotgun
sReplaceRifle       = Rifle
sReplaceLaser       = Laser
sReplaceTool        = Tool
sReplaceInteraction = Interaction
sReplaceCommand     = Command

[Crosshair.CustomReplacements_Aiming]
; Custom replacements when aiming in 1st person (needs sReplaceMode to be "Custom")
sReplacePistol      = Pistol
sReplaceCutter      = Cutter
sReplaceDot         = Dot
sReplaceShotgun     = Shotgun
sReplaceRifle       = Rifle
sReplaceLaser       = Laser
sReplaceTool        = Tool
sReplaceInteraction = Interaction
sReplaceCommand     = Command

[Crosshair.CustomReplacements_3rdPerson]
; Custom replacements in 3rd person (needs sReplaceMode to be "Custom")
sReplacePistol      = Pistol
sReplaceCutter      = Cutter
sReplaceDot         = Dot
sReplaceShotgun     = Shotgun
sReplaceRifle       = Rifle
sReplaceLaser       = Laser
sReplaceTool        = Tool
sReplaceInteraction = Interaction
sReplaceCommand     = Command

[Crosshair.CustomReplacements_3rdPerson_Aiming]
; Custom replacements when aiming in 3rd person (needs sReplaceMode to be "Custom")
sReplacePistol      = Pistol
sReplaceCutter      = Cutter
sReplaceDot         = Dot
sReplaceShotgun     = Shotgun
sReplaceRifle       = Rifle
sReplaceLaser       = Laser
sReplaceTool        = Tool
sReplaceInteraction = Interaction
sReplaceCommand     = Command


[HitAndKill]
; Hit and kill markers on the crosshair
bEnabled = 1
; Colorize the widget. If the value is empty, the default HUD color will be used.
sColor =
bForceColor = 0
; Re-position the widget - default position: 960, 538
fPositionX = 960
fPositionY = 538
fScale = 100
fRotation = 0

[ExplosiveIndicator]
; Shows an indicator when an explosive thing is near you
bEnabled = 1
; Colorize the widget. If the value is empty, the default HUD color will be used.
sColor =
bForceColor = 0
; Re-position the widget - default position: 960, 540
fPositionX = 960
fPositionY = 540
fScale = 100
fRotation = 0

[DirectionalHit]
; Displays a indicator from where you were hit
bEnabled = 1
; Colorize the widget. If the value is empty, the default HUD color will be used.
sColor =
bForceColor = 0
; Re-position the widget - default position: 960, 540
fPositionX = 960
fPositionY = 540
fScale = 100
fRotation = 0

[StealthMeter]
; Shows your current stealth level
bEnabled = 1
; Colorize the widget. If the value is empty, the default HUD color will be used.
sColor = 255, 255, 255
bForceColor = 0
; Re-position the widget - default position: 960, 128
fPositionX = 960
fPositionY = 128
fScale = 100
fRotation = 0

; Override color for the various stealth modes
sBarColorHidden =
sBarColorCaution =
sBarColorDetected =
sBarColorDanger =

[ArtifactPowers]
; Artifact powers widget. You know what it is when you are at that stage in the game.
bEnabled = 1
; Colorize the widget. If the value is empty, the default HUD color will be used.
sColor =
bForceColor = 0
; Re-position the widget - default position: 960, 540
fPositionX = 960
fPositionY = 540
fScale = 100
fRotation = 0

[SocialCommands]
; I have no idea what this is. But that won't prevent me from letting you modify it.
bEnabled = 1
; Colorize the widget. If the value is empty, the default HUD color will be used.
sColor =
bForceColor = 0
; Re-position the widget - default position: 1090, 190
fPositionX = 1090
fPositionY = 190
fScale = 100
fRotation = 0

[CrewBuff]
; Crew buffs widget
bEnabled = 1
; Colorize the widget. If the value is empty, the default HUD color will be used.
sColor =
bForceColor = 0
; Re-position the widget - default position: 1851, 139
fPositionX = 1851
fPositionY = 139
fScale = 100
fRotation = 0

[QuestMarker]
; The floating quest marker on the HUD
bEnabled = 1
; Colorize the widget. If the value is empty, the default HUD color will be used.
sColor = 255, 255, 255
bForceColor = 0

[HitDamage]
; Shows hit damage
bEnabled = 1

; Colorize the widget. If the value is empty, the default HUD color will be used.
sColor = 255, 255, 255
bForceColor = 0

[EnemyHealth]
; Contains the enemy health bars.
bEnabled = 1
; Colorize the widget. If the value is empty, the default HUD color will be used.
sColor = 255, 255, 255
bForceColor = 0


; ========================
;  Doc: Available columns
; =======================
; AMMO - Show used ammo type
; AMMO_ROUNDS - Show available rounds for ammo type
; DR - Damage resistance
; DMG - Weapon damage
; DPS - Weapon damage per second (Burst DPS, so without reload-time)
; FAV - Shows your favorite assignment number
; MASS - Weight
; MASS_STACK - Weight per stack
; RARITY - Shows the rarity of the item (rare, epic, legendary for weapon/apparel and common, uncommon, rare,... for other items)
; VALUE - VALUE
; VALUE_STACK - Value per stack
; VPM - Value / Mass

; Detail columns for weapon
; WMANUFACTURER - Shows the manufacturer of the weapon
; WACC - Weapon accuracy
; WBASENAME - Shows the base name of the weapon (e.g. Eon, Grendel, Maelstrom,...)
; WMAG - Weapon ammo capacity
; WMODS - Weapon mod slots ( used / max )
; WRANGE - Weapon range
; WROF - Weapon rate of fire (gund) / Attack speed (melee)
; WTYPE - Weapon Type

; Detail columns for armor
; ATHERMAL - Armor thermal
; ACORROSIVE - Armor corrosive
; AAIRBORNE - Armor airborne
; ARADIATION - Armor radiation

; Detail columsn for Damage
; PHYS - Weapon physical damage / Armor physical resistance
; ENGY - Weapon energy damage / Armor energy resistance
; EM - Weapon EM damage / Armor EM resistance
; ELEC - Weapon electrical damage / Armor electrical resistance [Currently unused in the game]

StarUI Inventory - 改进所有 PC 上的库存界面。许多生活质量功能和完全可自定义。 StarUI HUD - 自定义您的 HUD。重新定位、调整大小和重新着色小部件。物品标签图标、战利品列表物品卡片、Loot-O-Meter 和许多其他功能。 StarUI Workbench - 通过列、比较、紧凑设计、单独布局、生活质量功能等改进所有工作台。 StarUI Outpost - 通过新建筑菜单、更好的按键处理和许多生活质量功能改进前哨站界面。 StarUI Ship Builder - 通过可排序的列、类别和变体列表以及大量生活质量功能改进飞船建造器界面。 StarUI Configurator - 在一个排列整齐、功能丰富的图形界面中配置所有 StarUI 模组。
![图片](https://
还没有人评论,去客户端里说两句吧。
评论在新手盒子客户端中发表,这里同步展示。